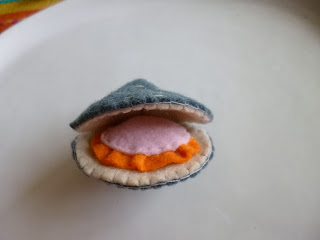
Hey felt lovers! Welcome to my very first felt food tutorial. Let's learn to make clams today :)
1. Cut out these shapes - You'll need 4 gray pieces, 2 beige pieces, 1 orange piece and 2 pink pieces.
2. Make the shells - To create a shell shape, close the gap on the gray piece like so:
You need to make two of these, one for the top shell and one for the bottom.
3. Add some texture - Using beige thread, sew lines on your top and bottom shells.
Be sure to stagger the beige lines :)
4. Create the inner shells - Sew a piece of beige felt into the gray shell using a blanket stitch.
Here's what it should look like when you're done.
5. Make the frill - Use a running stitch, ruffle the orange felt up like so:
6. Make the clam's body - Sew the two pink pieces together, along with the orange ruffle.
Leave a gap so you can stuff the body of the clam with polyfill.
Here's the completed clam body.
7. Assemble your clam - Attach the clam's body onto the bottom shell.
Sew the top and bottom shells together.
8. You're done! Enjoy your happy clam :)


These are really cute! Nice tutorial! Thanks for sharing.
ReplyDelete